Router
This document explains how to create and manage routers in OpenStack. A router is a core component that enables communication between different networks.
Creating a Router
This section provides a step-by-step guide on how to create a router in OpenStack.
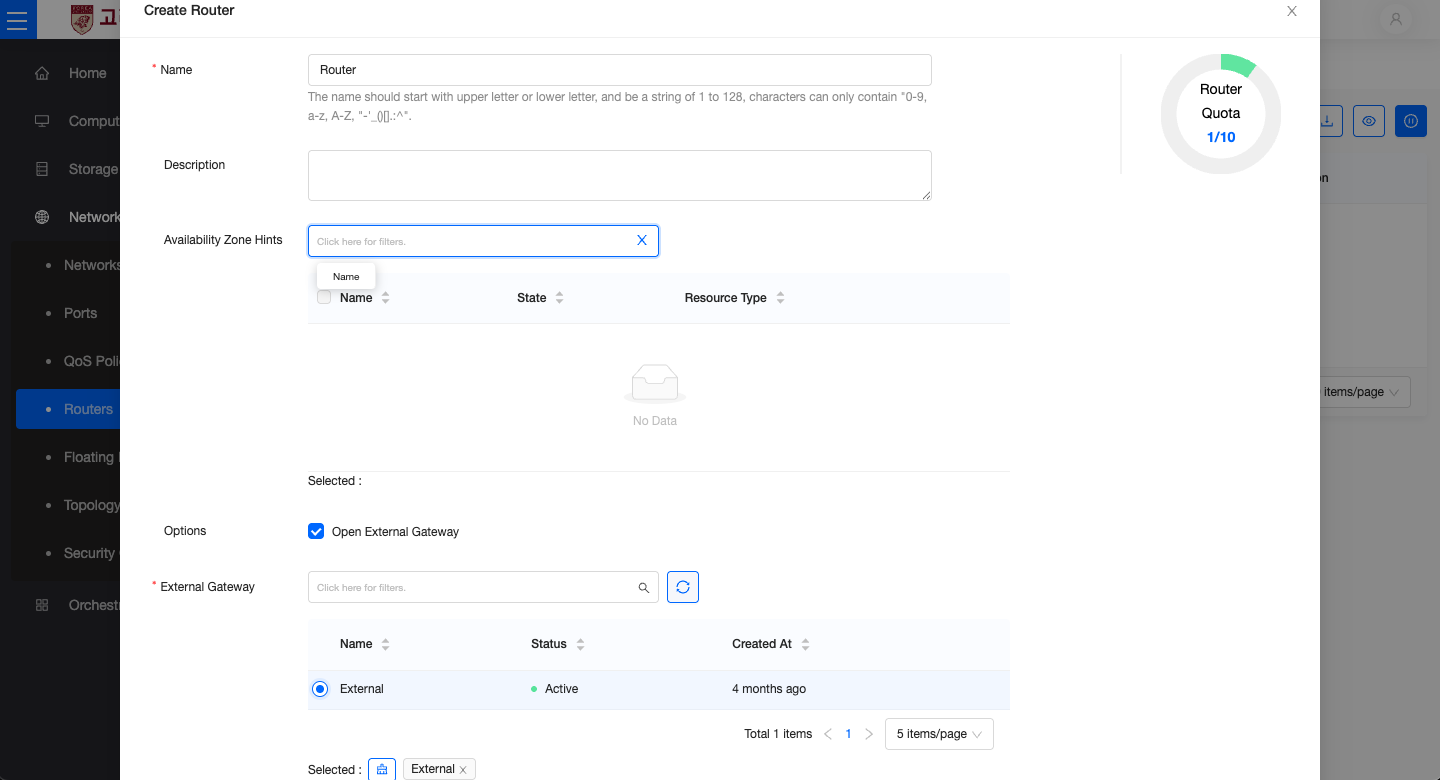
- In the left-hand menu, go to Network → Routers, then click the Create Router button.
- Name: Enter the name of the router (e.g.,
Router,External_Router1). - Description: Optionally provide a description of the router.
- External Gateway
- Enable the Set Gateway option.
- Select the external network (e.g.,
External).
- Click the Create button to complete the router setup. The created router will appear in the router list.
Connecting a Subnet
This section explains how to connect an internal network (subnet) to the created router.
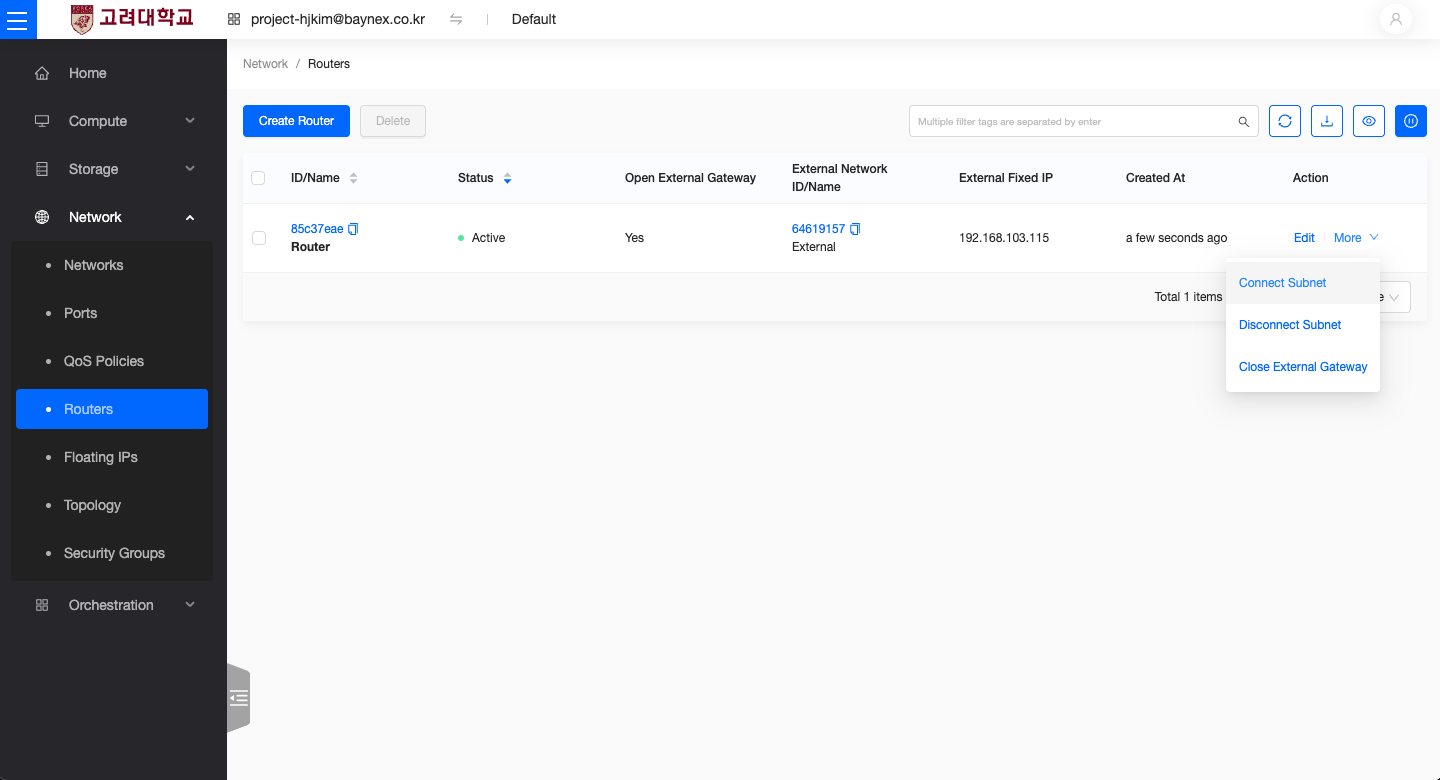
- In the router list, click the Add Interface button for the target router.
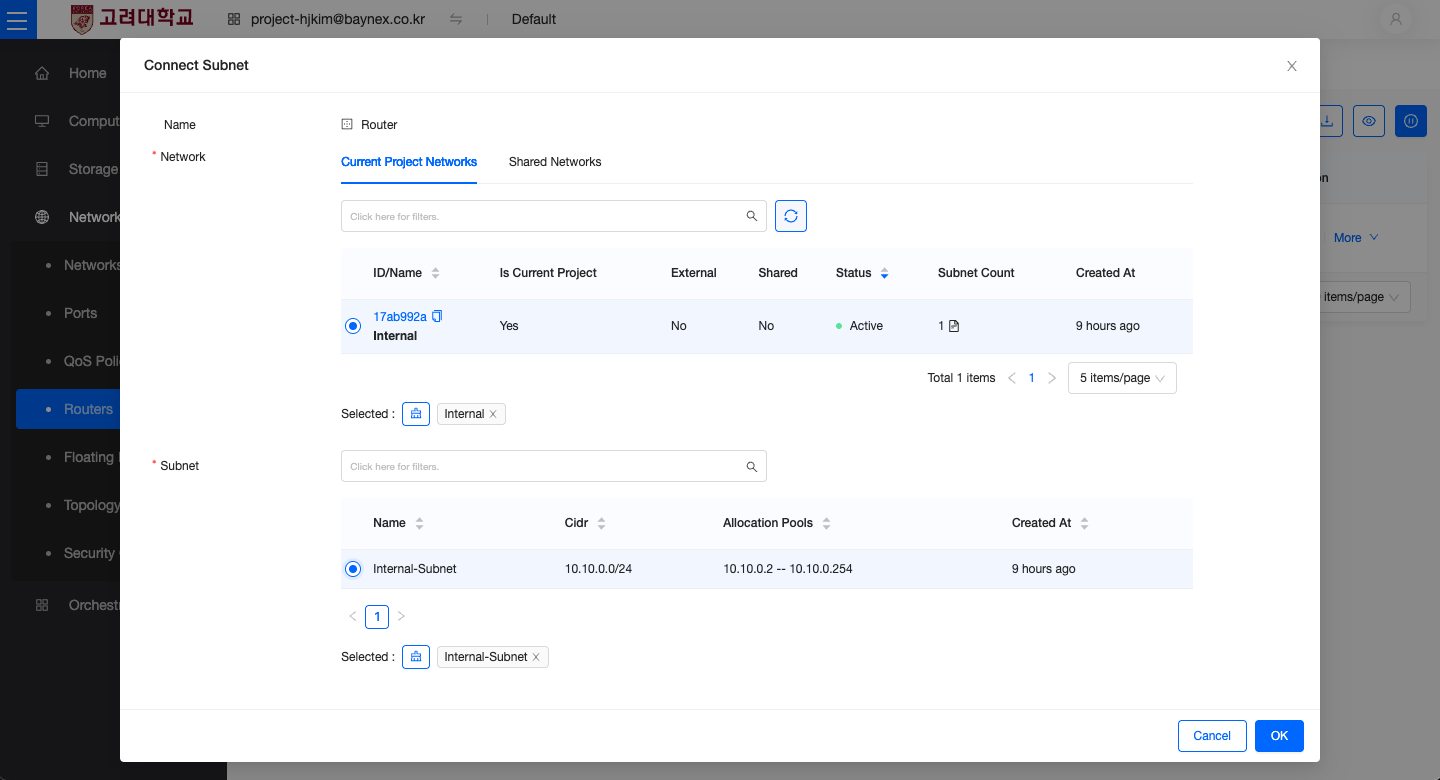
- Select the subnet from the internal network to connect.
- Verify the CIDR range (e.g.,
10.10.0.0/24). - Click Confirm to complete the connection.
Checking Router Status
This section explains how to verify that the router was created and connected properly.
- In the router list, check that the status is marked as
Active. - Confirm that the external network and internal subnet are both properly connected.